Table of Contents
Introduction
The LED blinking circuit is a simple project that helps beginners learn about electronics and Arduino. It involves connecting an LED to an Arduino board and making it blink on and off. This is done by sending ON (HIGH) and OFF (LOW) signals from the Arduino to the LED. A small resistor is added to protect the LED from too much current.
This project is easy to set up and teaches important basics like how to write simple Arduino code and how to connect components in a circuit. It’s a great starting point for learning how to control LEDs and is the first step towards building more advanced projects with lights, sensors, and other devices.
Hardware Requried
| S.no | Component | Qty. |
|---|---|---|
| 1. | Arduino Uno | 1 |
| 2. | BreadBoard | 1 |
| 3. | LED | 1 |
| 4. | Resistor 220Ω | 1 |
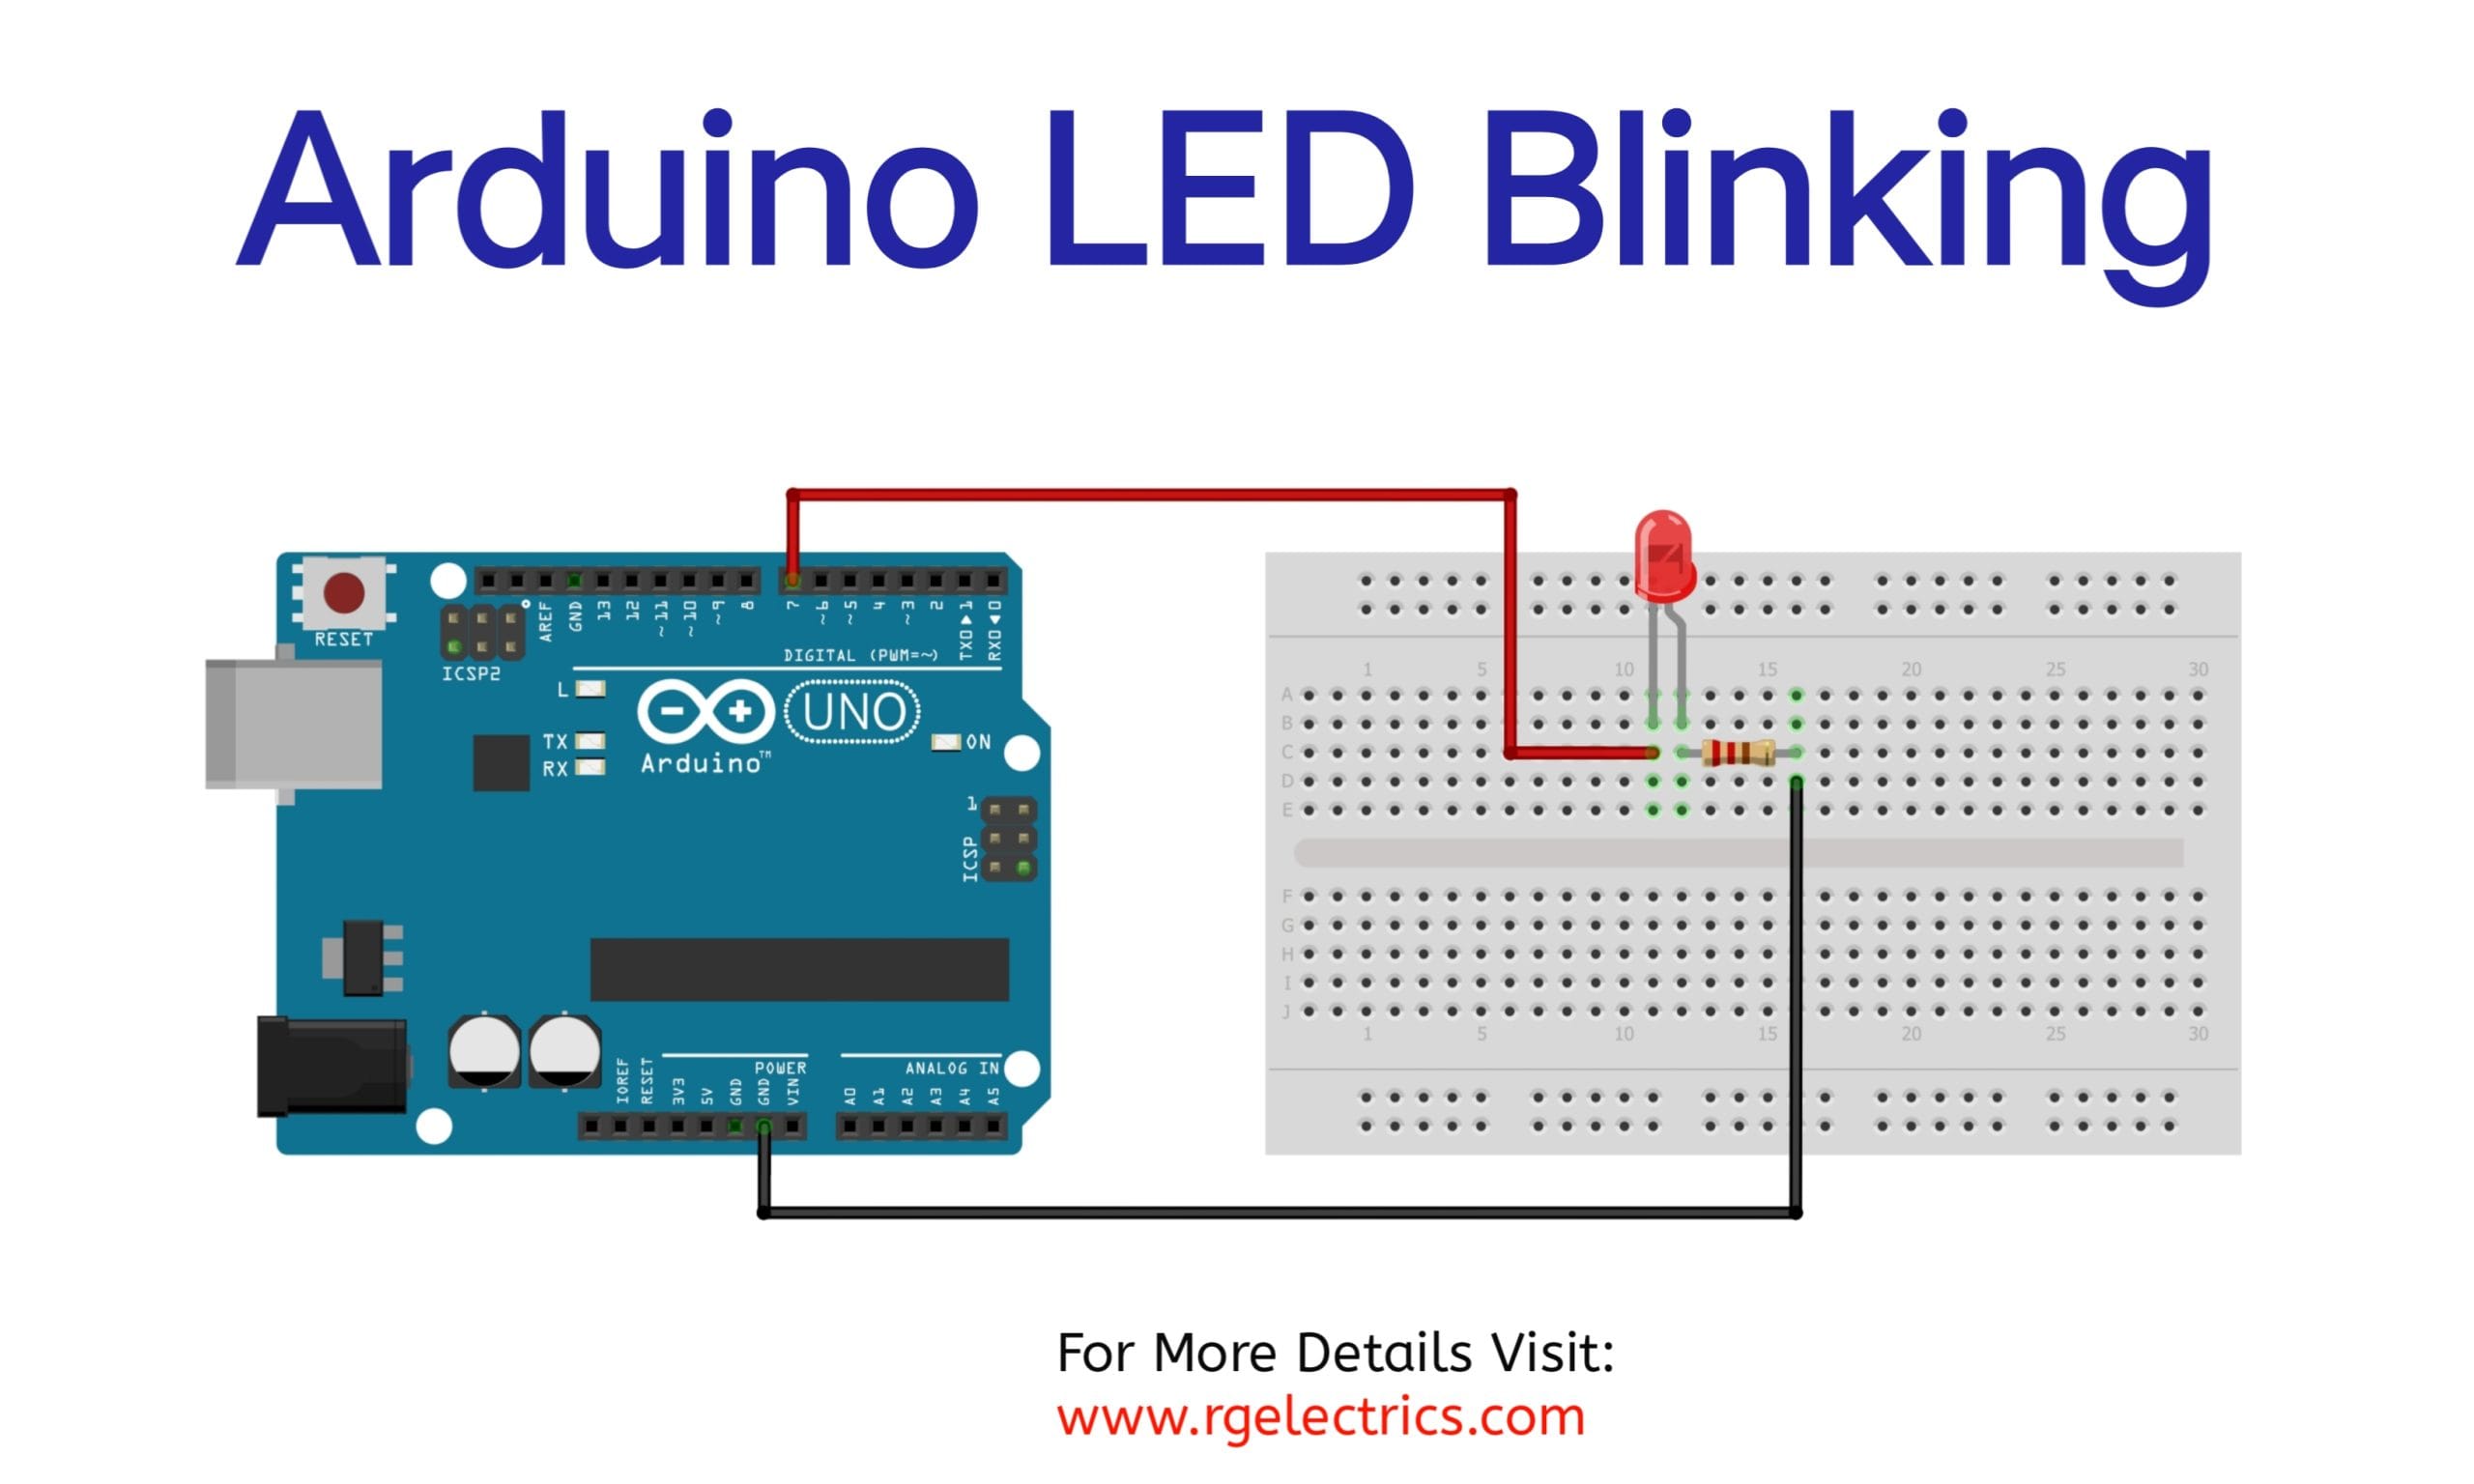
Schematic

Code Explain
explanation of the LED blinking code, line by line:
const int ledPin = 7;
This defines a constant variable ledPin and assigns it the value 7. It represents the digital pin on the Arduino where the LED is connected. Using a constant makes the code easier to modify and read.
void setup() {
pinMode(ledPin, OUTPUT);
}
void setup(): This is a function that runs once when the Arduino is powered on or reset. It’s used to set up initial configurations.
pinMode(ledPin, OUTPUT): Configures the ledPin (pin 7) as an output. This tells the Arduino to send signals (HIGH or LOW) to this pin, which controls the LED.
void loop() {<br>digitalWrite(ledPin, HIGH);<br>delay(1000);<br>digitalWrite(ledPin, LOW);<br>delay(1000);<br>}
void loop(): This function runs continuously after setup(). The code inside this function will repeat indefinitely.
First Section:
cppCopy code<code>digitalWrite(ledPin, HIGH);
</code>
- Explanation: Sends a HIGH signal (5V) to the
ledPin. This turns the LED ON.
cppCopy code<code>delay(1000);
</code>
- Explanation: Pauses the program for 1000 milliseconds (1 second). The LED remains ON during this time.
Second Section:
cppCopy code<code>digitalWrite(ledPin, LOW);
</code>
- Explanation: Sends a LOW signal (0V) to the
ledPin. This turns the LED OFF.
cppCopy code<code>delay(1000);
</code>
- Explanation: Pauses the program for another 1000 milliseconds (1 second). The LED remains OFF during this time.
Code for Blinking LED
Installing Arduino IDE
First, you need to install Arduino IDE Software from its official website Arduino. Here is a simple step-by-step guide on “How to install Arduino IDE“.
Now copy the following code and upload it to Arduino IDE Software.
// Pin connected to the LED
const int ledPin = 7;

void setup() {
  // Set the LED pin as an output
  pinMode(ledPin, OUTPUT);
}

void loop() {
  // Turn the LED on
  digitalWrite(ledPin, HIGH);
  delay(1000); // Wait for 1 second (1000 milliseconds)

  // Turn the LED off
  digitalWrite(ledPin, LOW);
  delay(1000); // Wait for 1 second
}
Working Explaination
This circuit uses an Arduino UNO to control an LED’s blinking. The LED is connected to digital pin 7 through a current-limiting resistor to protect it from damage. The code defines pin 7 as an output and alternates its state between HIGH (5V) and LOW (0V) in the loop() function. When the pin is HIGH, current flows through the resistor and LED, causing it to light up. When the pin is LOW, no current flows, and the LED turns off. The delay(1000) function pauses the program for 1 second between each state, creating the blinking effect. The resistor prevents excessive current from damaging the LED. This simple project demonstrates how Arduino controls electronic components.
Applications
- Status Indicator
- Debugging ToolSignal
- TransmissionVisual Alerts
- Learning Tool for Beginners
- Timers and Delays