Table of Contents
Introduction
Tesla coils are iconic inventions of Nikola Tesla, capable of generating high-voltage, high-frequency alternating current (AC) electricity. They demonstrate key principles of electromagnetic induction, resonance, and wireless power transfer.
This article explains how to build a simple and compact Tesla coil using a 2N2222 NPN transistor. Operating at just 9V DC, this circuit is great for beginners to safely experiment with Tesla coil basics using readily available components.
Component Details
| S.No | Component | Value/Part Number | Quantity |
|---|---|---|---|
| 1 | Power Supply | 9V DC Battery | 1 |
| 2 | Switch | SPST | 1 |
| 3 | Resistor | 22kΩ | 1 |
| 4 | Transistor | 2N2222 | 1 |
| 5 | LED | Any color | 1 |
| 6 | Primary Coil | 3 Turns (Thick Wire) | 1 |
| 7 | Secondary Coil | 300 Turns (Thin Wire) | 1 |
| 8 | Connecting Wires | – | As Needed |
2N2222 Pinout

| Pin Number | Pin Name / Function |
|---|---|
| 1 | Collector |
| 2 | Base |
| 3 | Emitter |
🧠 Tip: When holding the flat side of the 2N2222 transistor facing you and pins pointing downward, the pins from left to right are: Collector (1), Base (2), Emitter (3).
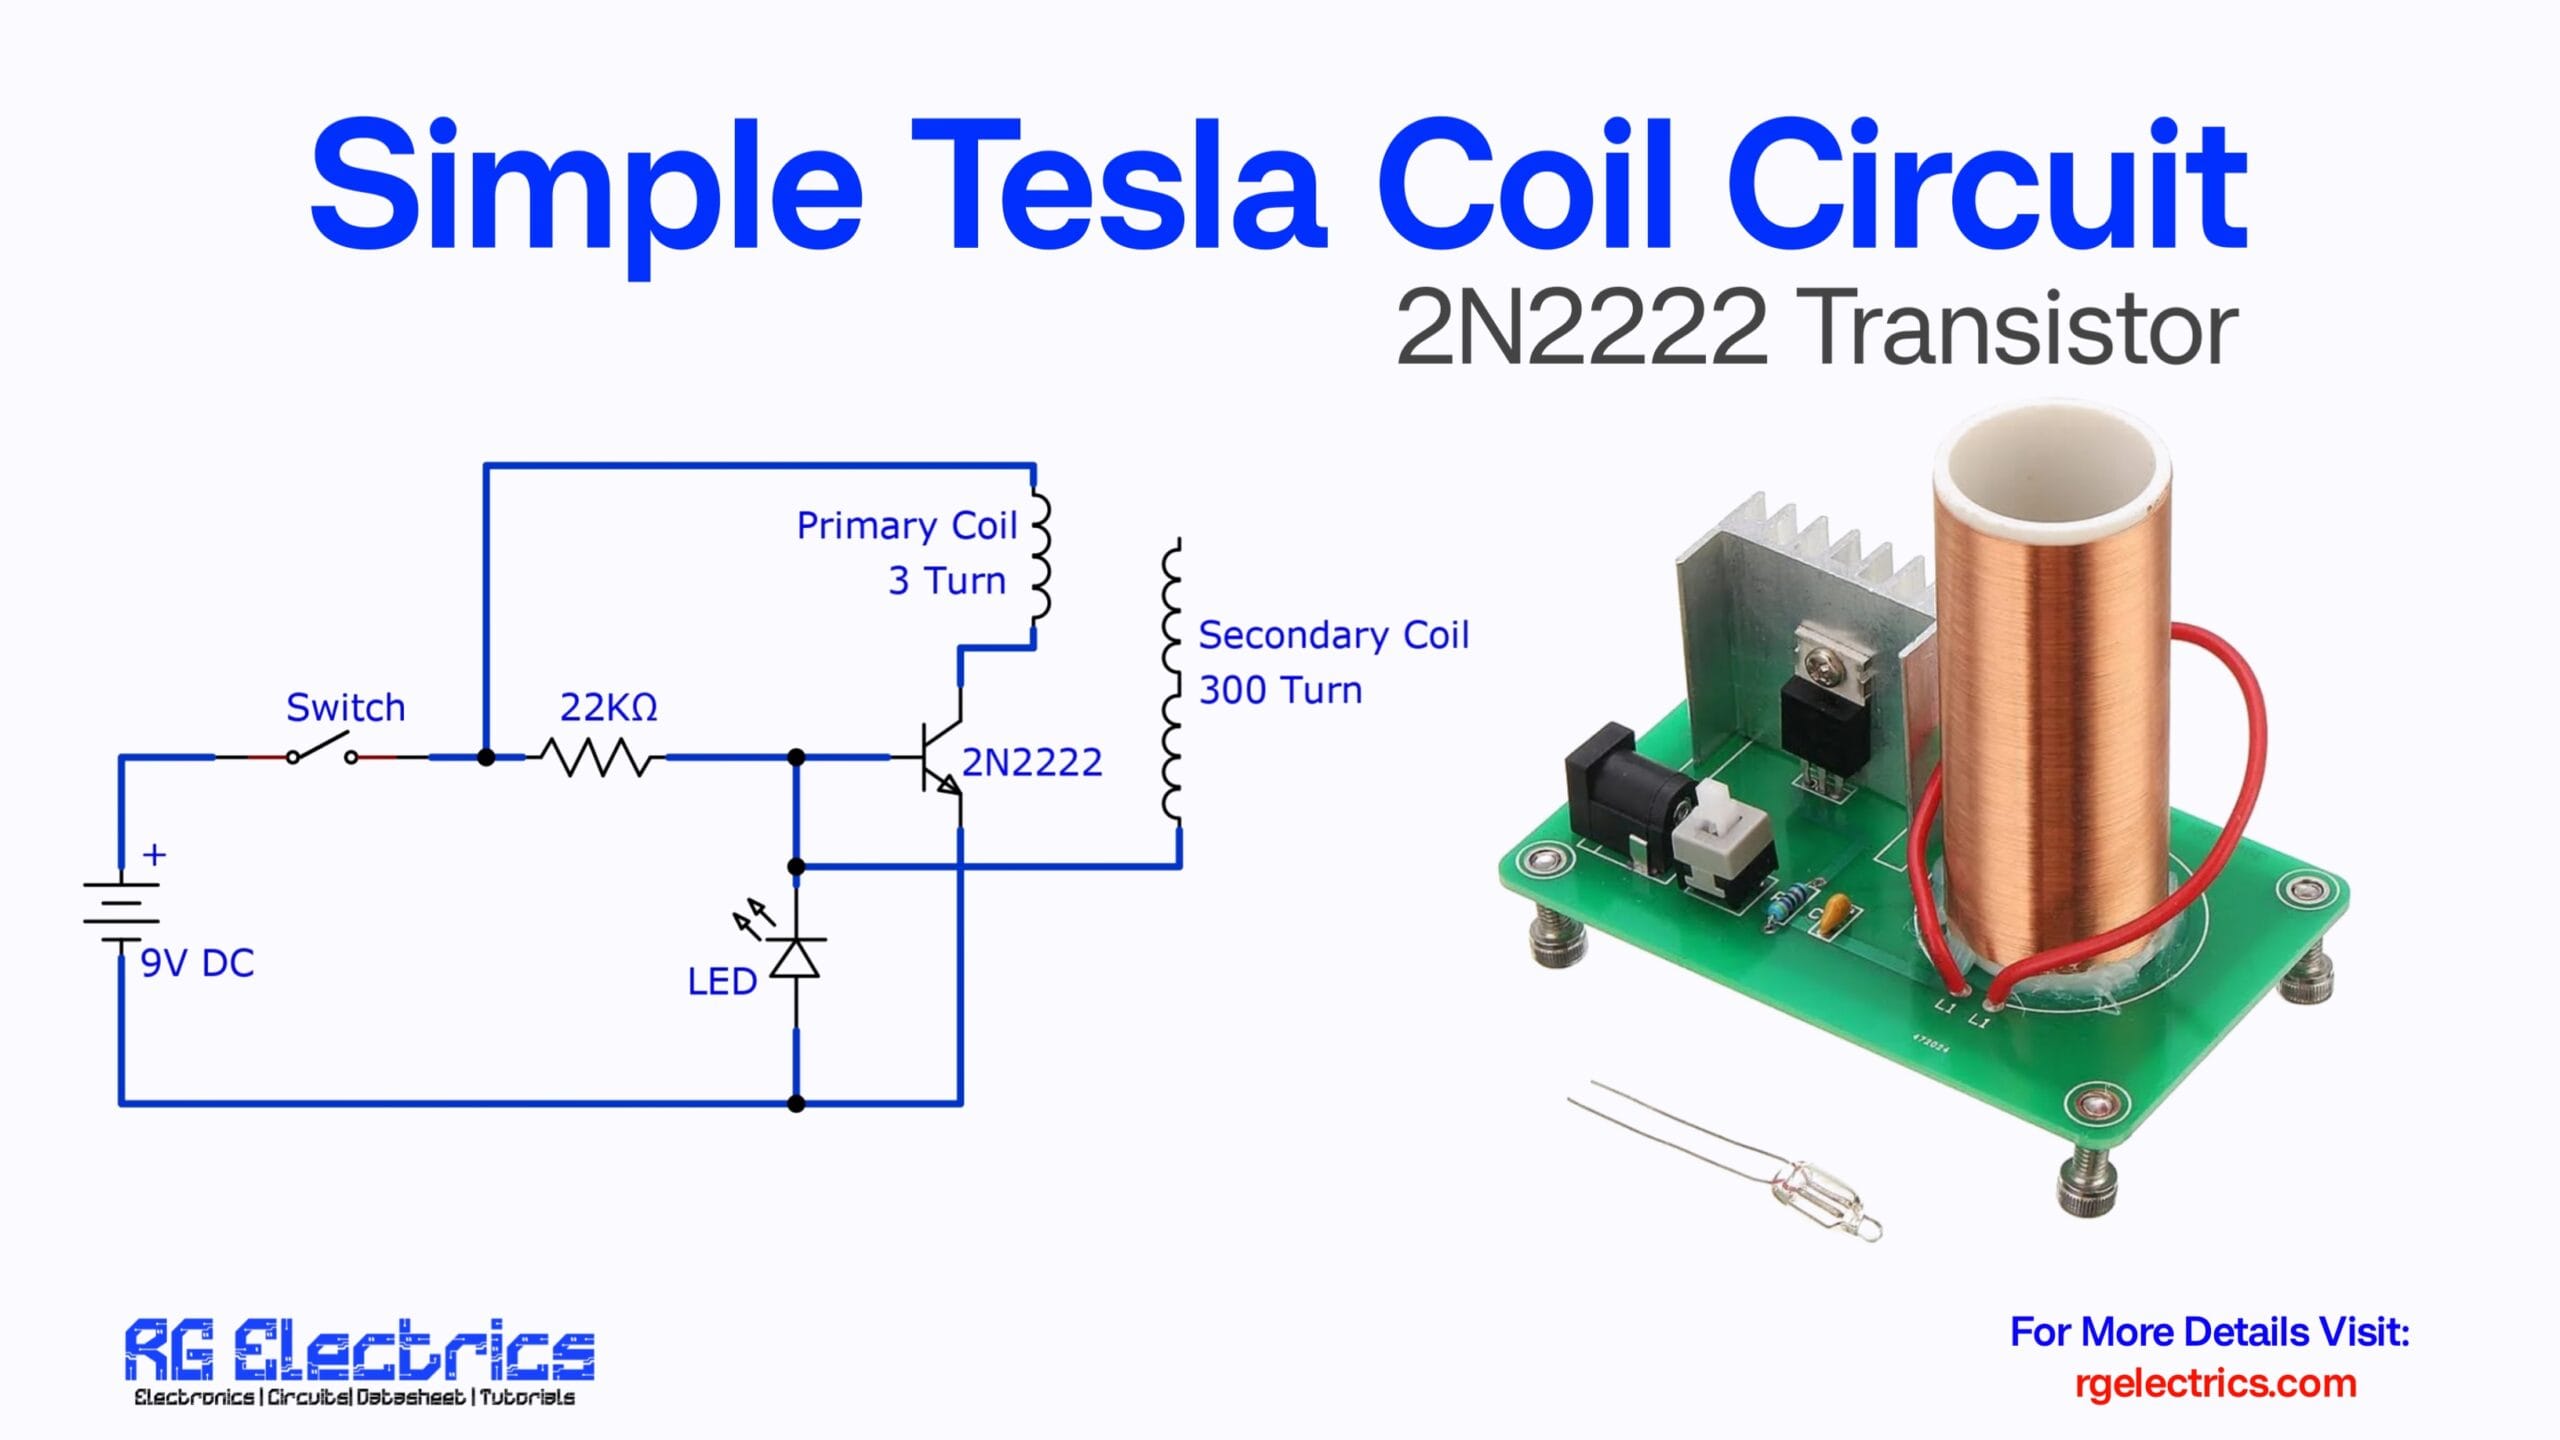
Circuit Diagram

How the Circuit Works
This Tesla coil uses a self-oscillating feedback system powered by a 9V DC supply. Here’s a breakdown of how it functions:
1. Power Supply and Switching
- The circuit is activated using a simple SPST switch connected in series with the battery.
- Power flows through a 22kΩ resistor to the base of the 2N2222 transistor, initiating its conduction.
2. Oscillation Initiation
- The primary coil (3 turns) is directly connected to the collector of the 2N2222.
- The secondary coil (300 turns) is placed in close proximity to the primary coil, allowing magnetic coupling.
3. Feedback Loop
- As the transistor switches ON, current flows through the primary coil, generating a magnetic field.
- This induces a high voltage in the secondary coil due to the difference in the number of turns (step-up transformer principle).
4. LED Indicator
- An LED is placed between the base and emitter to show the circuit is active and also to slightly limit reverse voltage.
5. High Voltage Output
- The result is a high-frequency, high-voltage AC signal at the secondary coil.
- This can light up fluorescent bulbs, neon lamps, or wirelessly power other small circuits when brought nearby.
Applications
- 🧪 Educational Demonstrations – Great for teaching electromagnetic induction and resonance.
- 🔋 Wireless Power Transmission – Basic experiment in power transfer without direct contact.
- 📡 Electromagnetic Field Experiments – Study EM radiation from a compact device.
- 🎓 DIY Science Projects – Ideal for school and college science fairs.
- 💥 Spark Gap Demonstration – Can be modified to create small arcs/sparks.
⚠️ Safety Tips
- Even though it’s a low-voltage Tesla coil, avoid touching the secondary coil during operation.
- Do not use near sensitive electronic equipment.
- Use insulated wire for safety and proper construction.
🔚 Conclusion
This Simple Tesla Coil Circuit using a 2N2222 transistor is a fun and educational project that introduces you to the world of high-frequency transformers and wireless electricity. With just a handful of components and a 9V battery, you can build a working Tesla coil at home!